Assemble battery pack
Steps
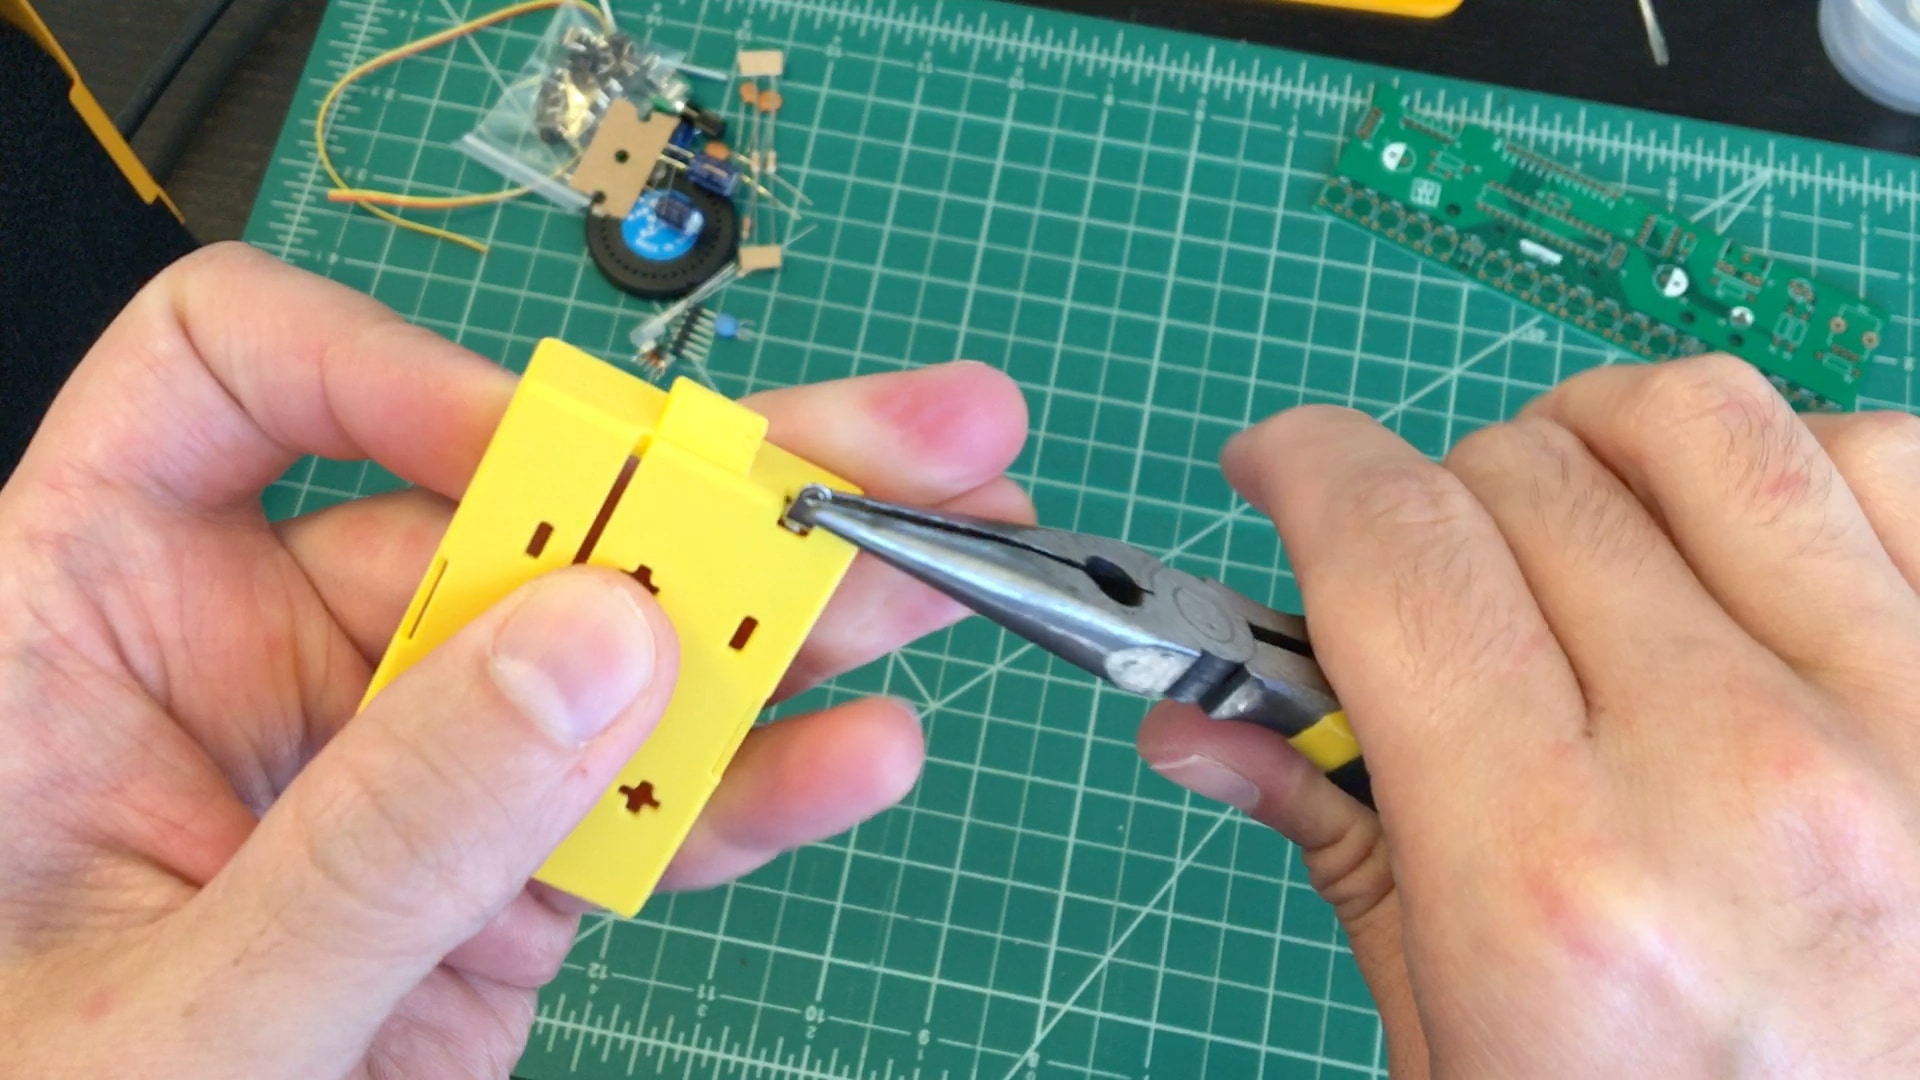
- Insert tabbed battery contact terminals
- The springed contact goes to the spot with a "-".
- The flat, button contact goes near "+". Its button should face inward towards where the battery will be.
- These tabbed contacts will have a tight fit! You can use pliers to push/pull them in, then fold their tabs over to hold them in place.
- Insert wire dual contacts
- Again, springs go to "-" and buttons to "+".
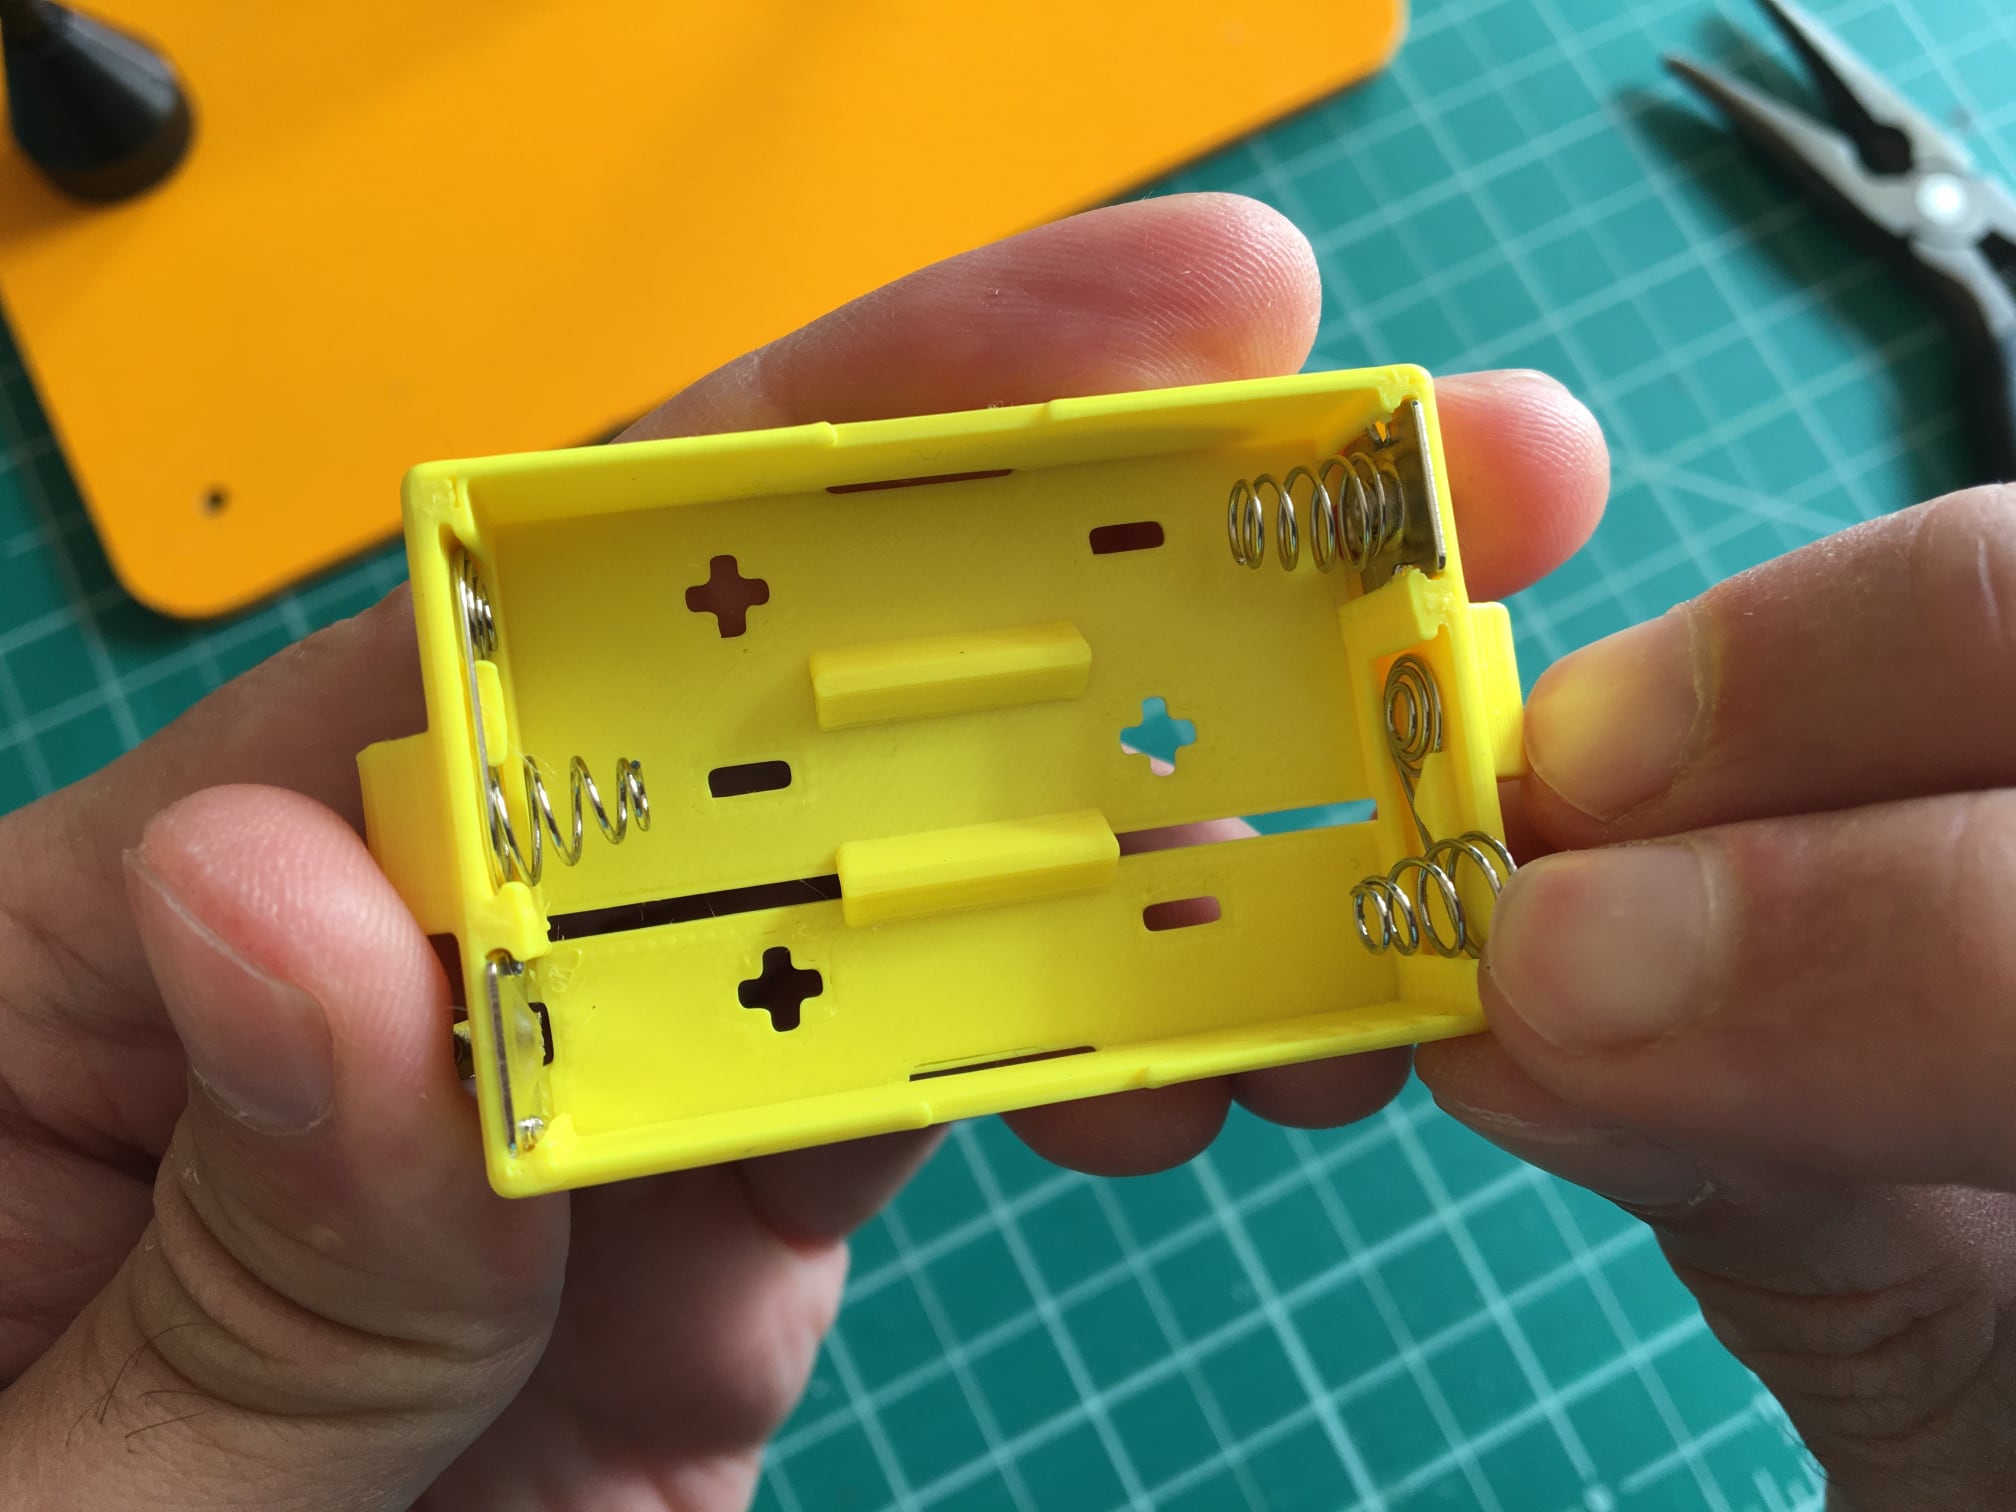
- Again, springs go to "-" and buttons to "+".
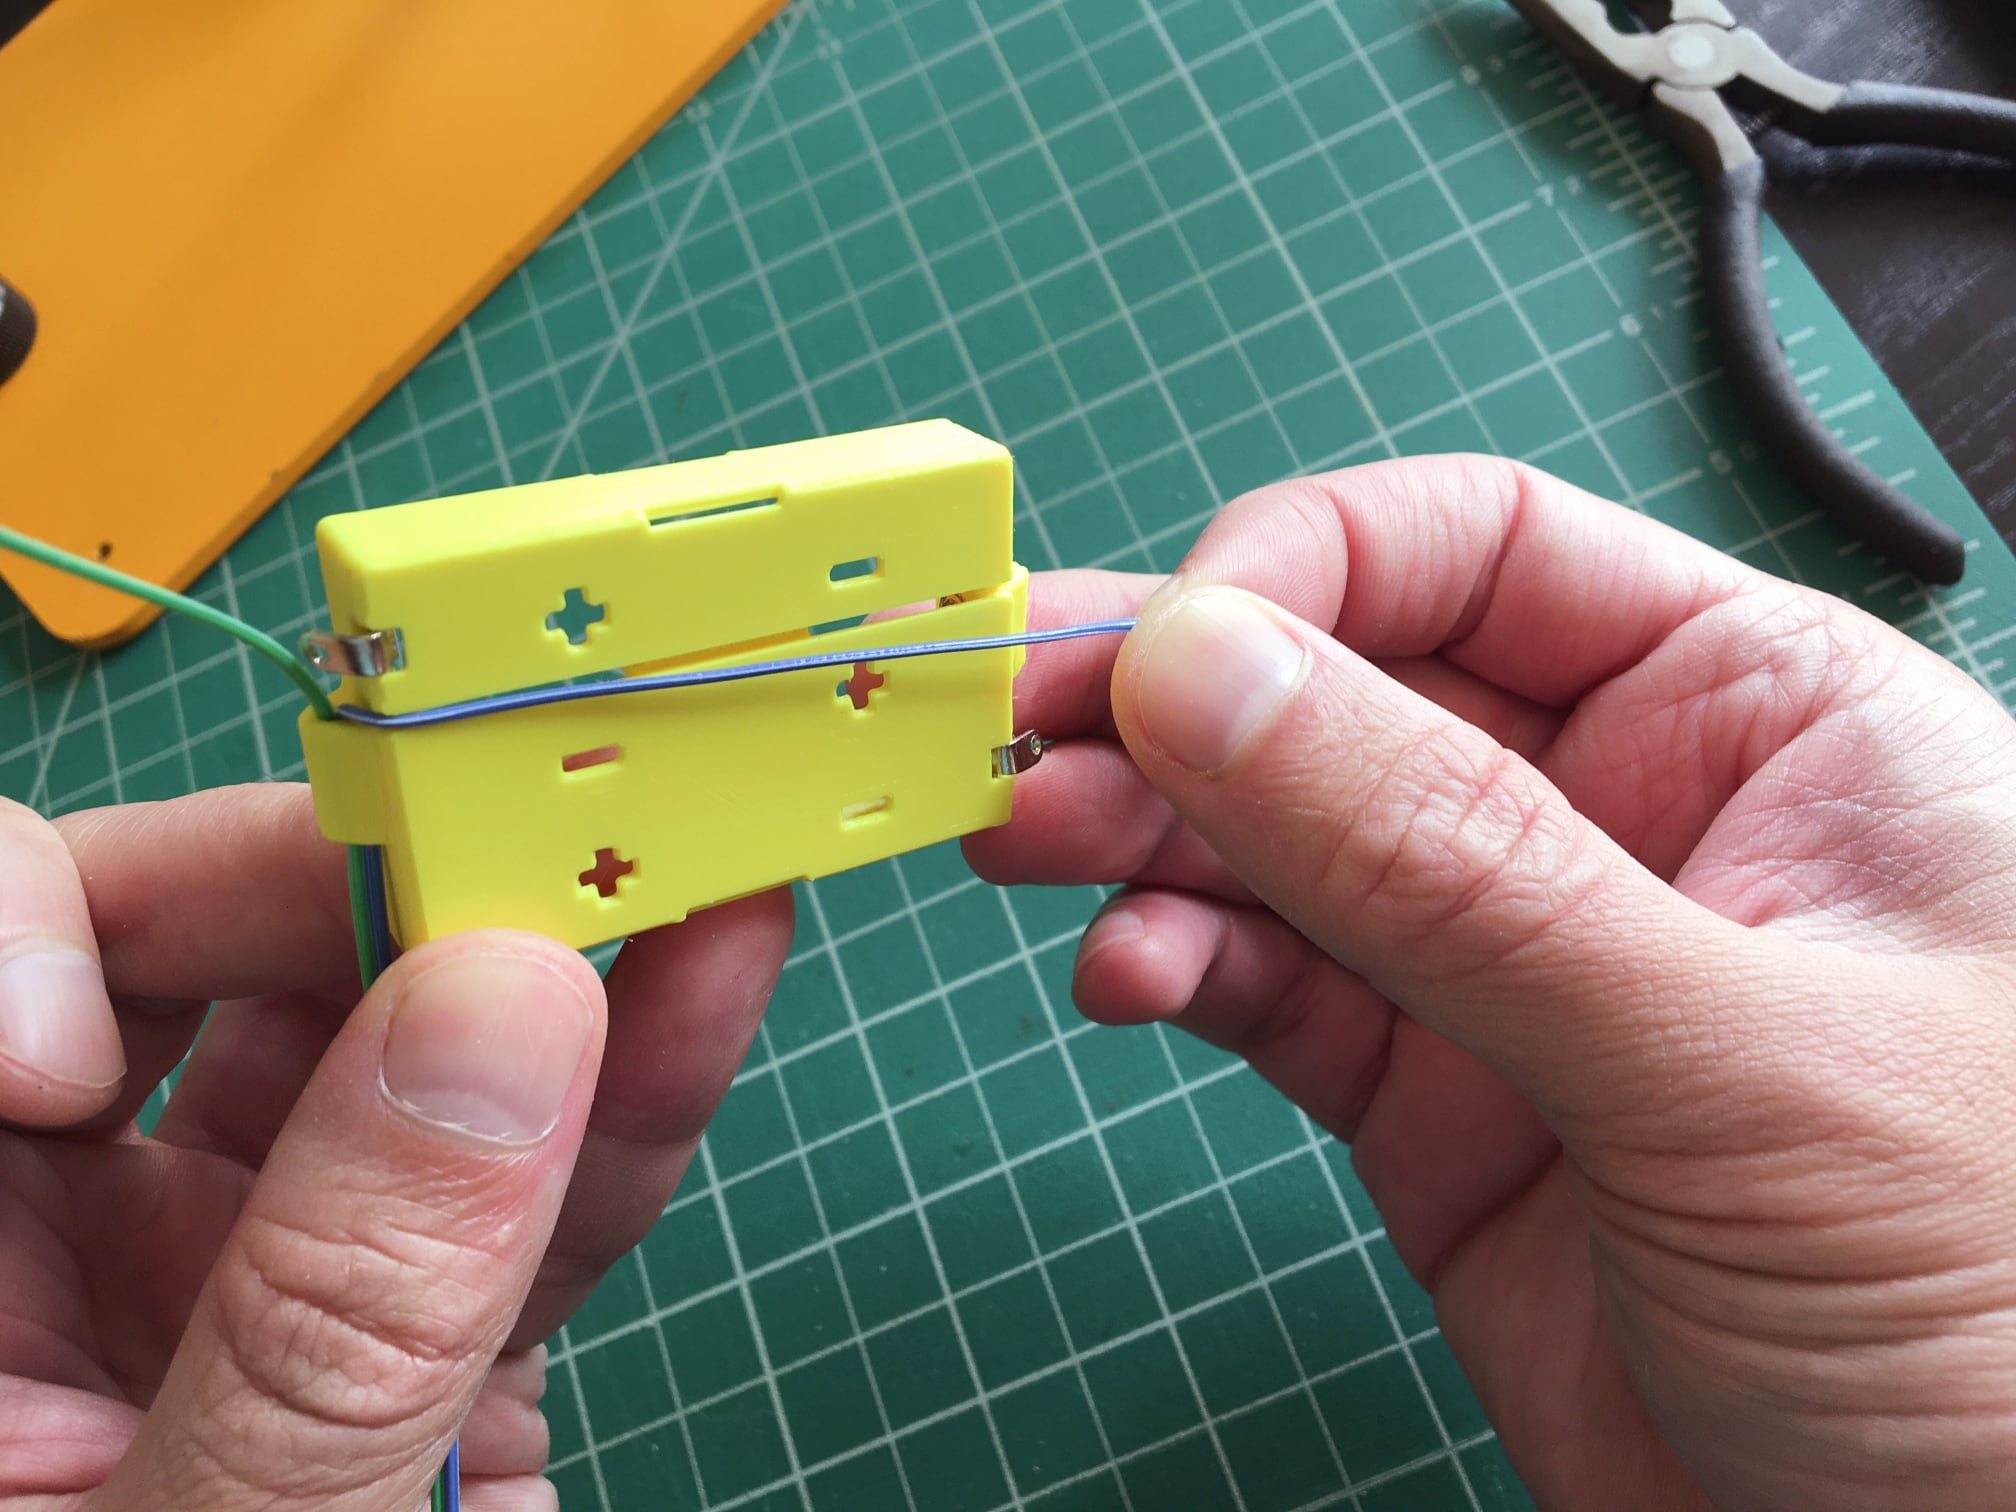
- Add wire
- Cut your ribbon cable into two pieces of about 7" and 3".
- With the battery holder oriented so its "+" contact tab is on the left and "-" on the right, thread the 7" ribbon cable through the hitch on the left, about halfway though, and then split the bottom pair of wires.

- Thread the darker wire of the now separated pair through the channel on the bottom of the battery holder and up through the right hitch. (Your ribbon cable will probably have different colors, and that's okay! A common convention is to use the darker color for "-" and the lighter one for "+".)
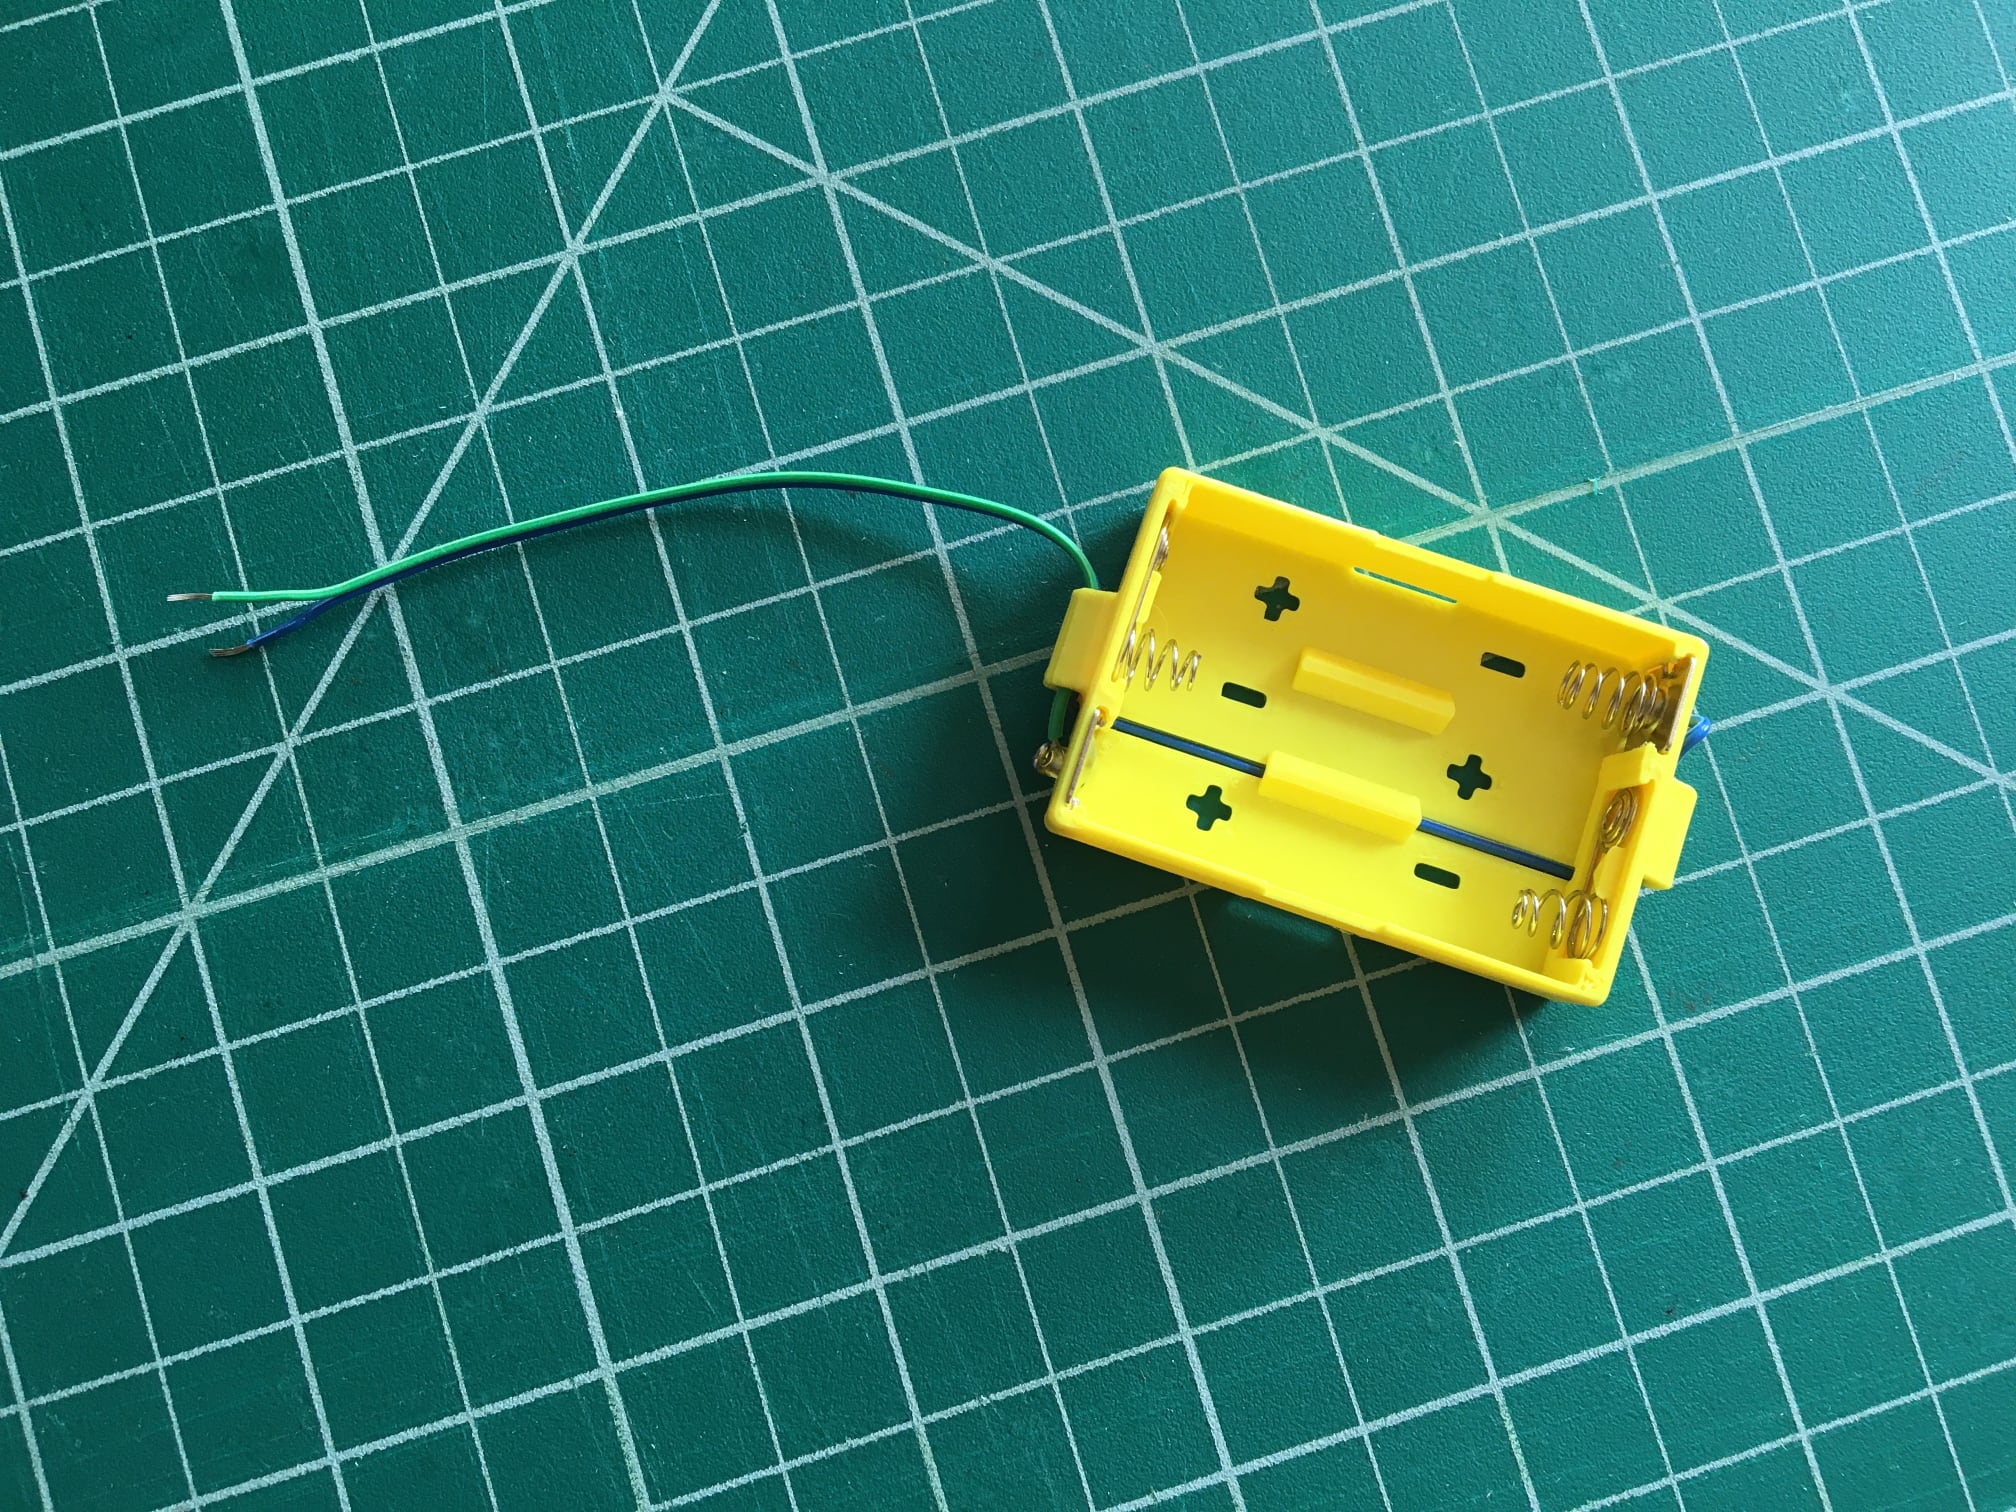
- Strip 1/4" of insulation off that right wire and solder to its contact tab. Try not to melt the plastic around it!
- Cut the wire on the left to meet its tab, then strip and solder it.
- Separate and strip the other side of wires. Make sure they don't touch!
- Insert three AAA batteries, matching their "+" and "-" sides to the battery holder's labels.
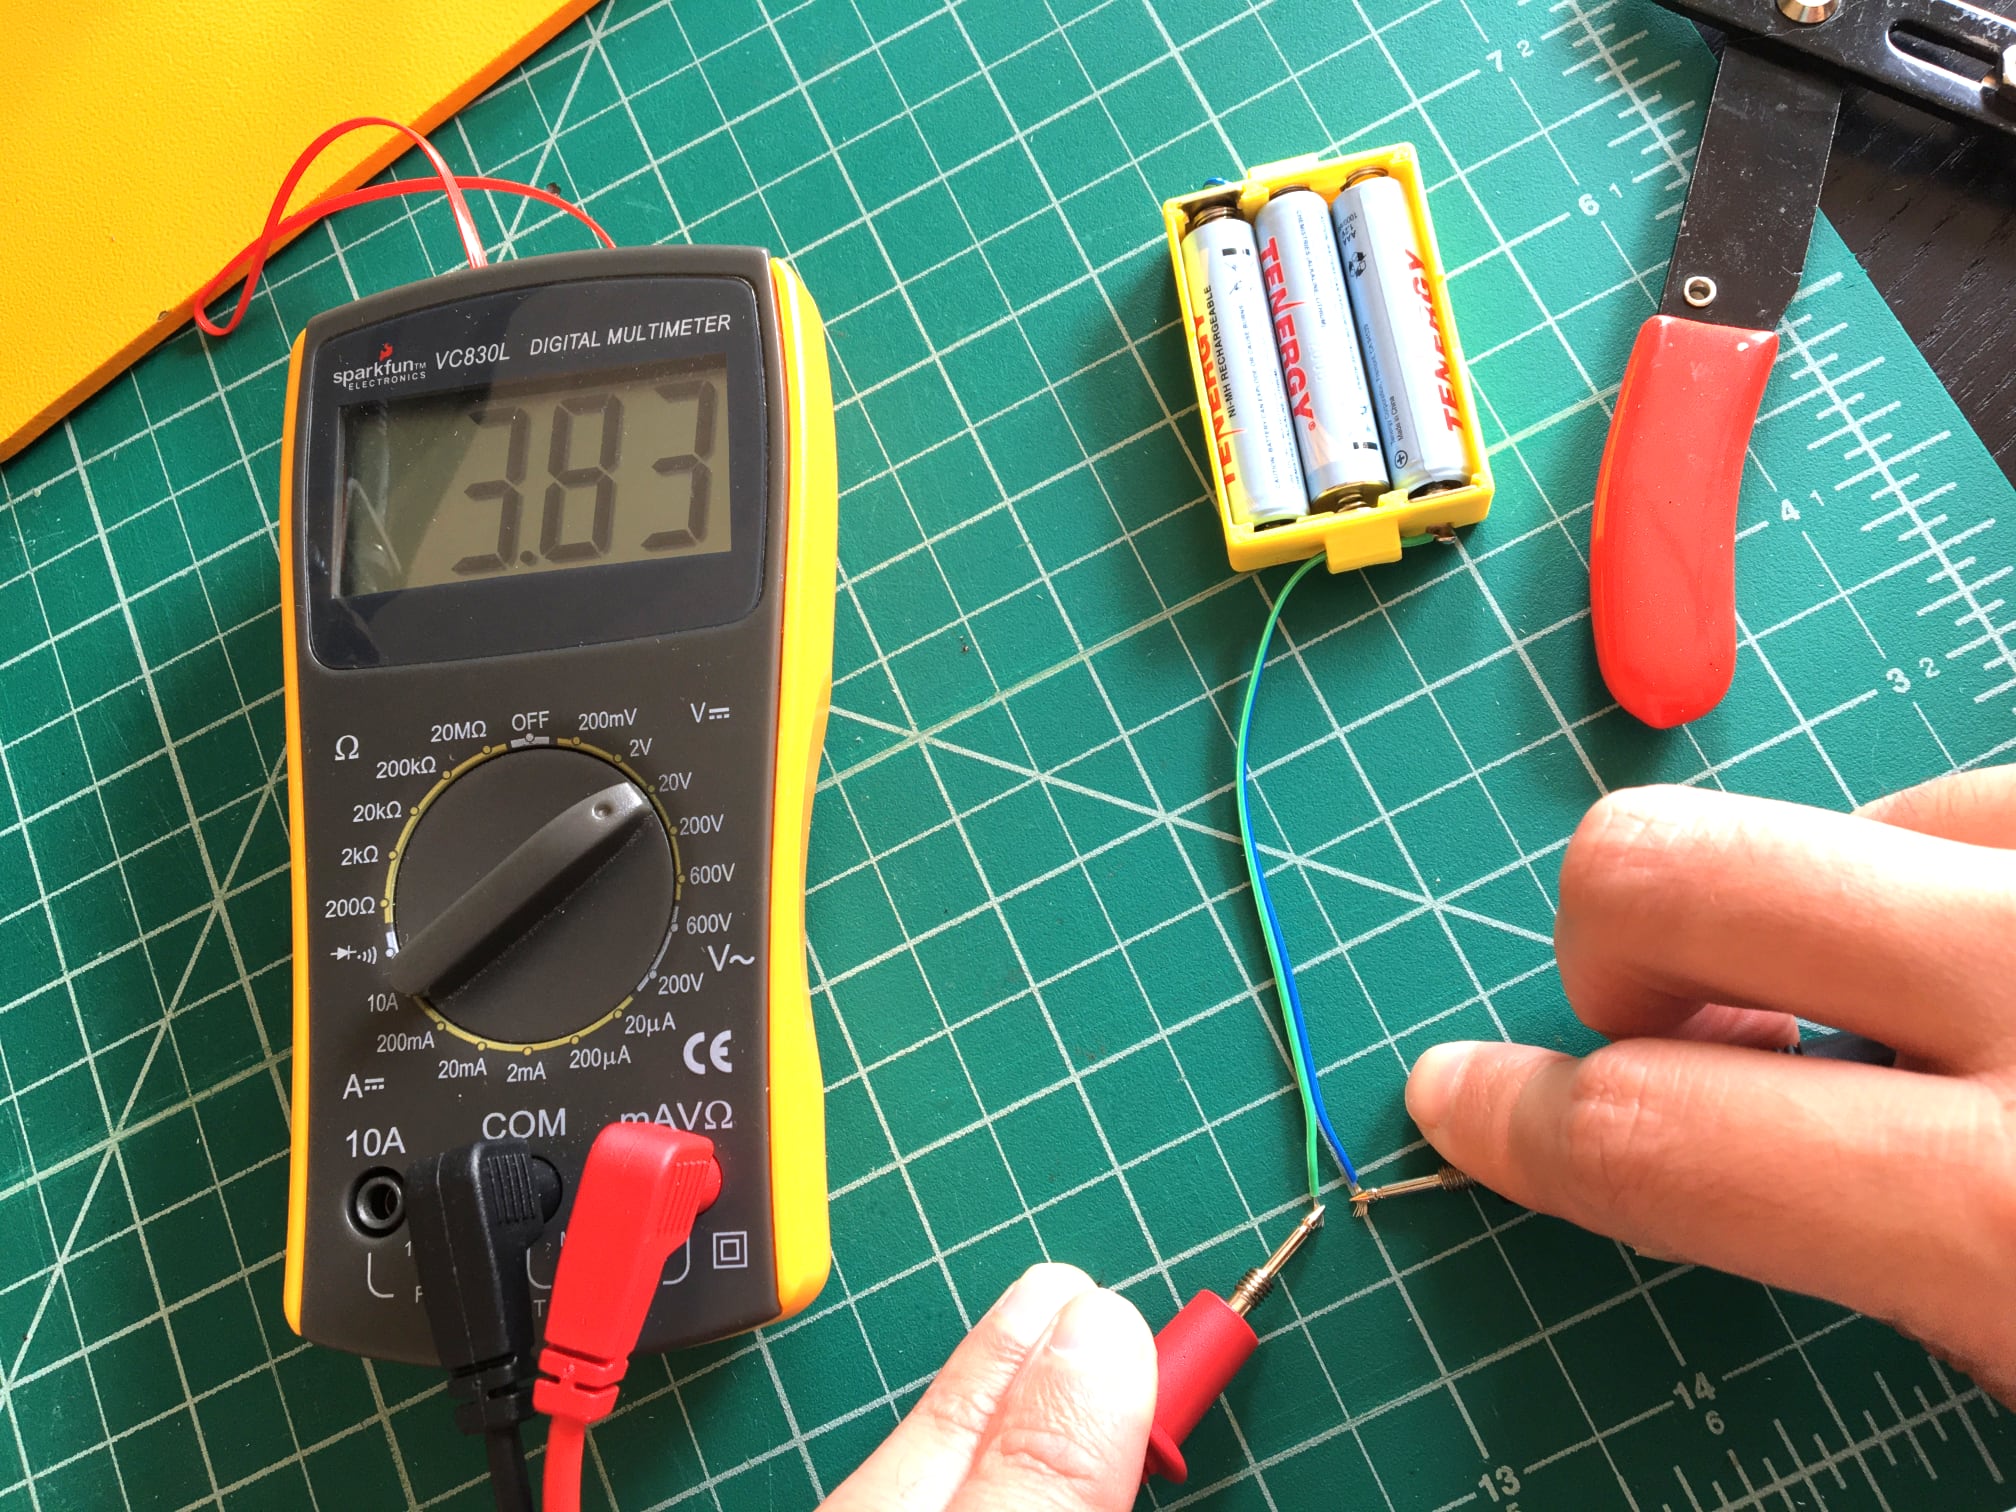
Test
Using a multimeter, measure the total voltage on those two wires. It should measure the sum of the three individual batteries' voltages -- ideally 3.6 to 4.5, depending on what kind of batteries they are. When done, remove the batteries to prevent accidentally draining them if the exposed wires touch.
If you're having trouble with your multimeter, try measuring each battery individually and see if they read as you expect. Then install them into the battery pack and check their combined voltage.
Not working as expected? Check the PCB troubleshooting section. Otherwise, continue to the next step.