3D-Printing Parts and Slicing
note
If you bought a kit with 3D-printed parts included, you can skip this section, but do open up the enclosure and confirm you have all the right pieces ready before continuing.
Download
Download STLs of the models on Thingiverse or PrusaPrinters.
Slicing
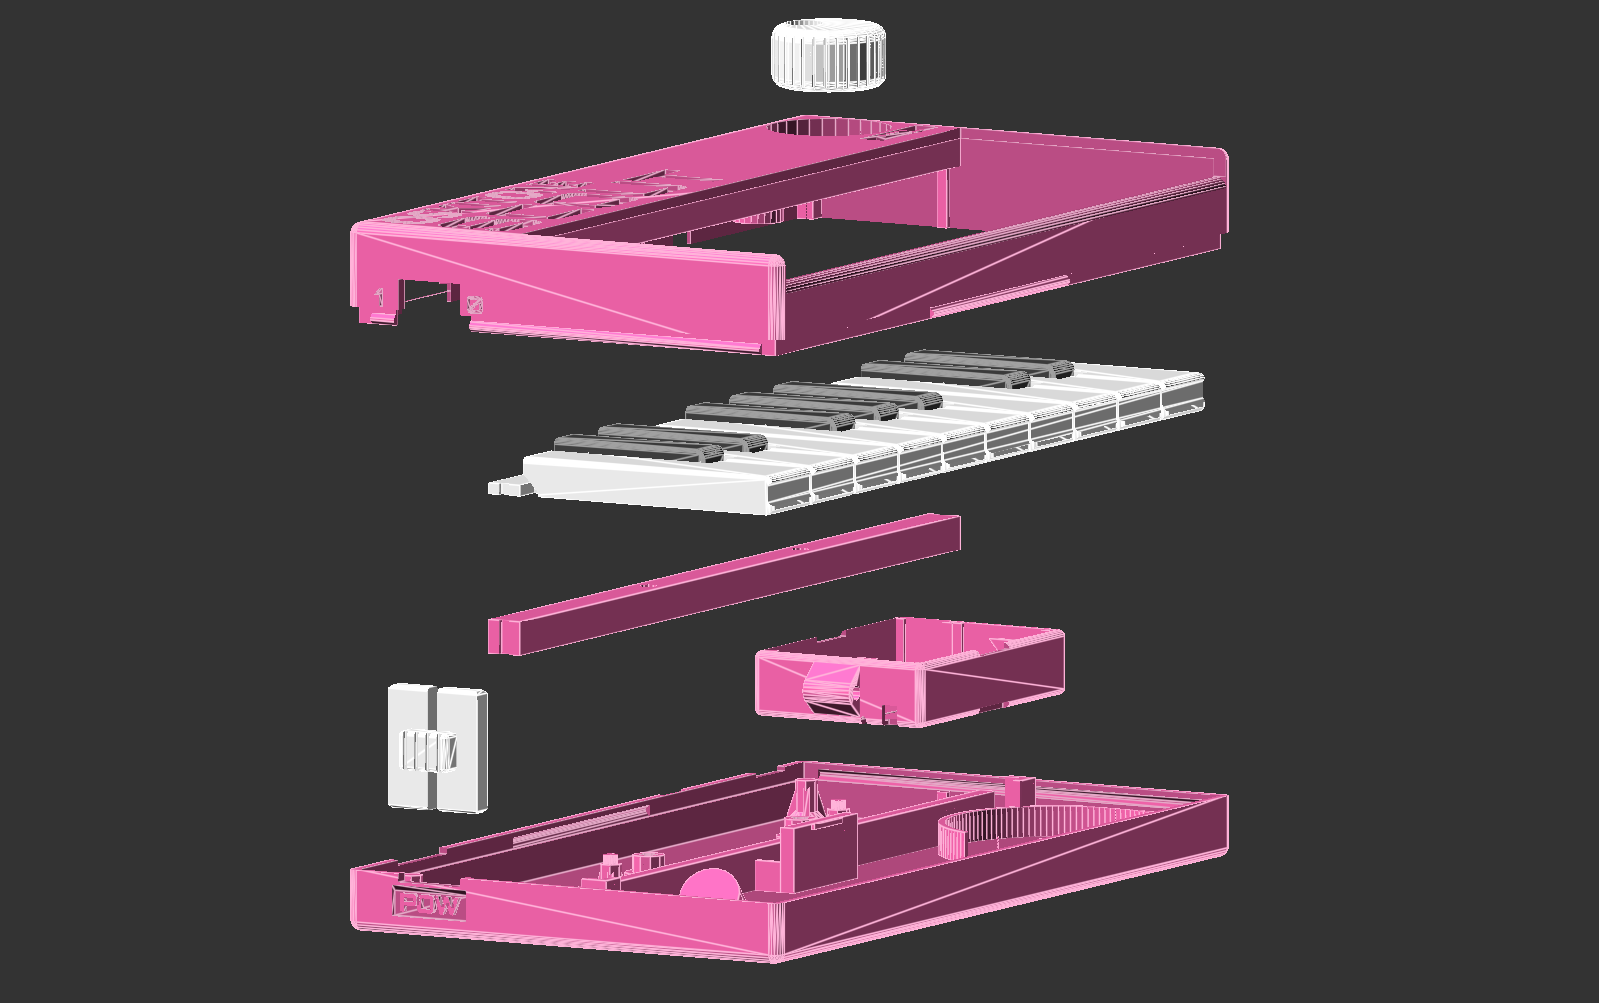
There are seven files to print, taking about 11 hours total.
| Part | Layer Height | Supports? | Color change at height | Estimated Time |
|---|---|---|---|---|
| battery_holder | .2mm | No | n/a | 40min |
| enclosure_bottom | .2mm | No | n/a | 3hr 10min |
| enclosure_top | .2mm | No | n/a | 3hr |
| keys_mount_rail | .2mm | No | n/a | 30min |
| keys | .2mm | No | 7.2mm | 3hr |
| knob | .2mm | No | n/a | 20min |
| switch_clutch | .2mm | No | n/a | 20min |
Notes:
- Models assume Fused Deposition Modeling with a standard .4mm nozzle. Using a bigger nozzle will likely result in a loss of detail (like missing "VOL" label text on the enclosure_top) and possibly missing internal walls.
- You may find the bottoms of the keys stick together because the plastic has expanded too far into the gap between them. See if your slicer has a setting called something like "Elephant foot compensation". Otherwise you'll need to carefully cut off the excess plastic with a utility knife.
- The 3D-printed parts were designed using PLA. Other filament types like ABS are not recommended and will likely have fit or tolerance issues. (If you find that you need to drill or file your prints, that's a good sign there'll be other problems too.)
- 20% infill works well across all models. I wouldn't advise going lower than 15% on the keys.
- Some slicers have trouble with the "color change" GCODE. Try a smaller test print first if you're unfamiliar, and maybe try "pause at layer" instead of "color change".
- Any supports the models need they'll already have, they'll already be rotated to the correct orientation for printing, and they shouldn't need brims. Brims on the keys, in fact, could cause warping on removal. (If you're experimenting with not using FDM, try the
*-no_supportSTLs that don't have supports.) - Watch the first couple layers of the enclosure pieces while printing, especially around the text engravings -- if you see bad adhesion, stop the print to remedy the situation and start again.
- If the prints aren't fitting together well, check to see that the corners aren't bulging. See if your slicer has settings for "coasting" or "linear advance."
- The enclosure_top and switch_clutch both have narrow support walls that will break off when they're done printing.
- If your slicer has it, you can experiment with "variable layer height", but pay attention to the details on the enclosure's text engravings and the aforementioned supports.
- Similarly, you may also like to play around with "ironing" the tops of the keys to make them shiny and flat. This will significantly increase print time!