3D-Printing
note
If you bought a kit with 3D-printed parts included, you can skip this step.
info
If you don't have access to a 3D printer and can't get the parts made, you can still assemble the kit's electronics without them. Continue on to the next step.
Models
Download STLs of the models from Printables or Thingiverse.
There are four files to print:
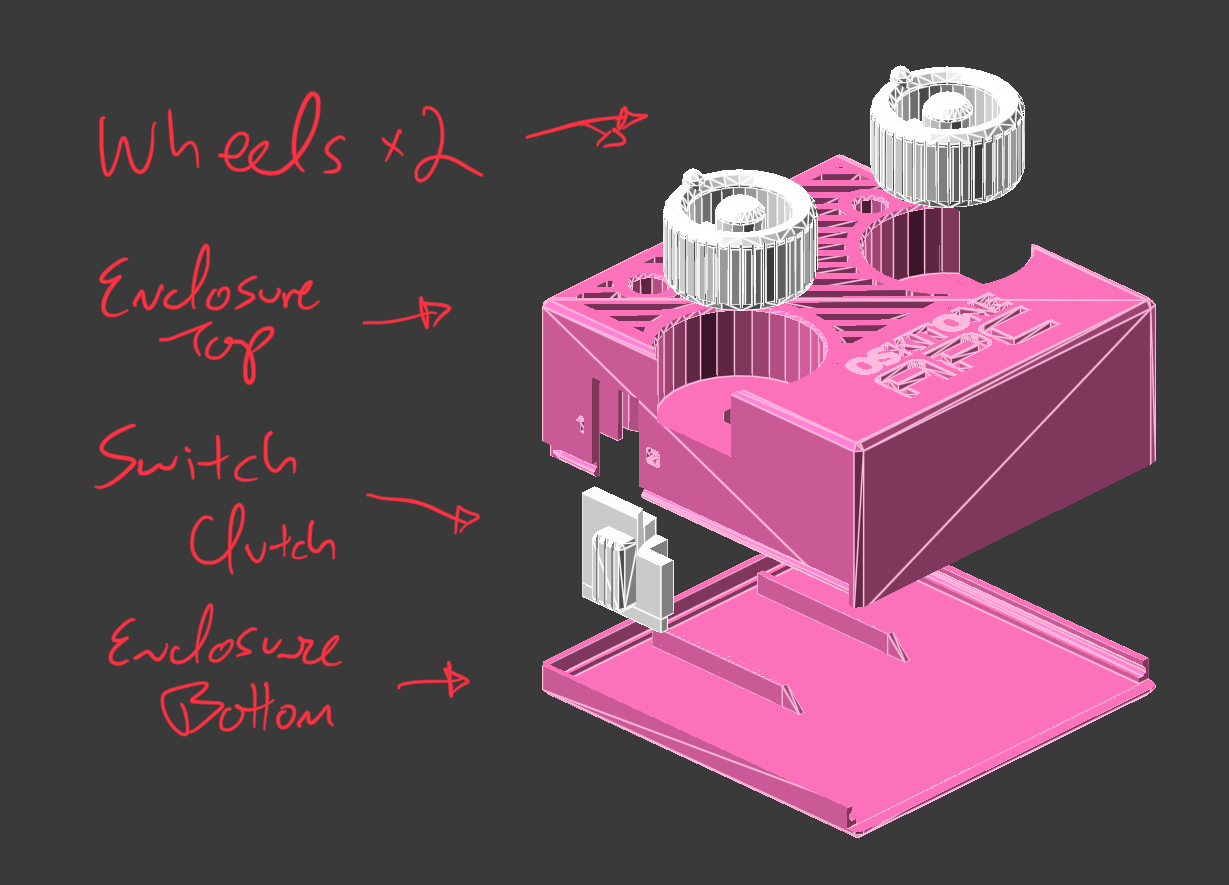
| Part | Count | Layer Height | Supports? | Estimated Time |
|---|---|---|---|---|
| Wheels | 2 | .2mm | No | 1hr 8min |
| Enclosure top | 1 | .2mm | No | 4hr |
| Switch clutch | 1 | .2mm | No | 20min |
| Enclosure bottom | 1 | .2mm | No | 48min |
Notes
- Models assume Fused Deposition Modeling with a standard .4mm nozzle. Using a bigger nozzle will likely result in a loss of detail and possibly missing internal walls.
- The 3D-printed parts were designed using PLA. Other filament types like ABS are not recommended and will likely have fit or tolerance issues. (If you find that you need to drill or file your prints, that's a good sign there'll be other problems too.)
- They also don't need supports and should already be rotated to the correct orientation for printing.
- Watch the first couple layers of the enclosure pieces while printing, especially around the text engravings — if you see bad adhesion, stop the print to remedy the situation and start again.
- If the prints aren't fitting together well, check to see that the corners aren't bulging. See if your slicer has settings for "coasting" or "linear advance."
- The switch clutch has two narrow support walls that will break off when it's done printing.